No matter how good your camera may be, to make it go the extra mile and become "picture perfect" editing programmes have to step in sometimes. I'll just start by saying I'm no pro with editing, I use a couple of programmes (that are thankfully free) that seem to do the job great for me personally and I just thought it would be nice to share what steps I take with my photos before hitting the publish button. The two programmes I use are PicMonkey and Photoscape X; both have the same tools but I divide my time between the two depending on my mood. A chargeable extra available on PicMonkey that I have opted to sign up for is the Royale membership, which works out £3 a month. As I don't have access to Photoshop by having this extra added, it gives me access to a wider range of fonts, textures, effects and touch-up tools. It's definitely not an essential for nice photos at all, I just like having the option.
Here is a breakdown of what options I use when editing:
Straighten - Despite my best efforts when I take the original photo, there is nothing more infuriating to me then when a photograph is not straight. On both programmes, when you straighten your photo you are given a grid and a scroll to help guide you. It seriously does wonders for my photos, it makes them look a lot neater giving me the perfect foundation to start editing how my photo looks.
Brighten and Highlight - Photos that are too dark or over-saturated are a straight up no-no. This is definitely the one tool I think everyone should use with there photos before posting. By working with brighten and highlight rather than just one, it allows the photo to not lose the clarity but still brighten up the photo and it usually always makes it look a million times better.
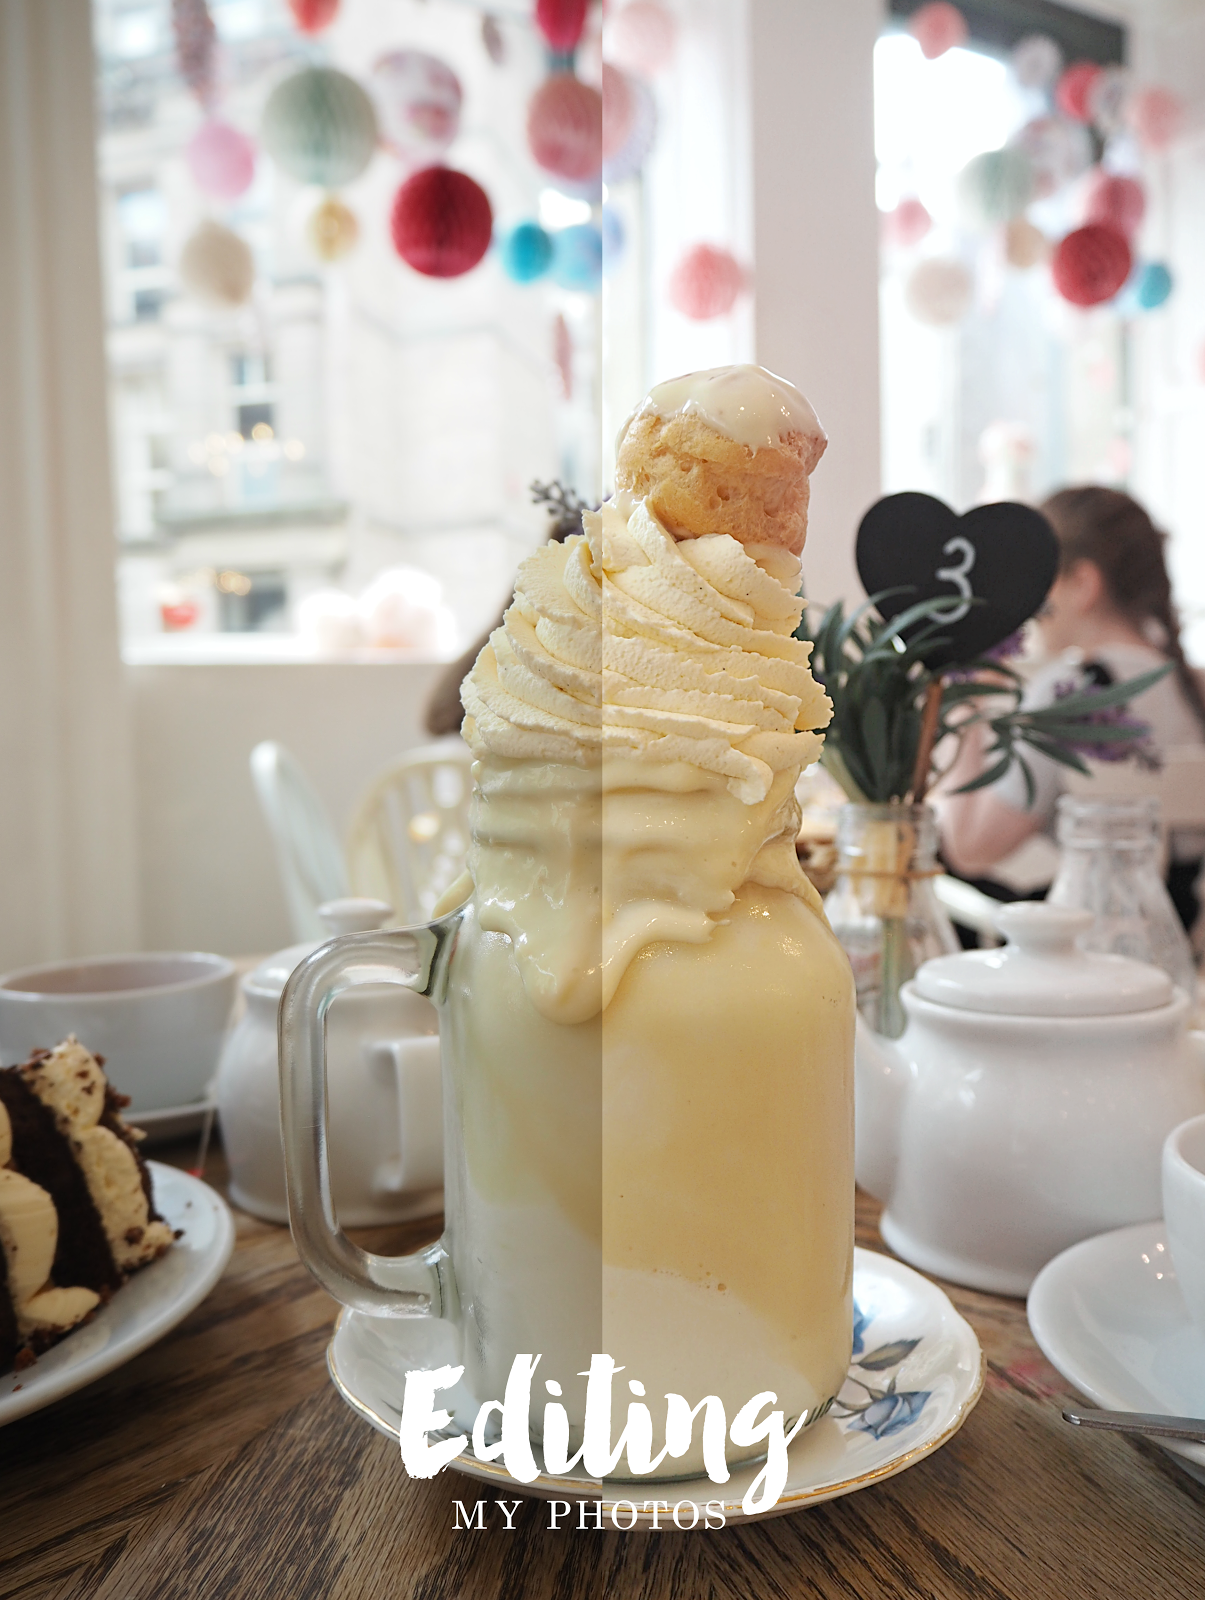
Contrast and Sharpening - You can adjust the relative brightness of a picture, the difference between its darkest and lightest areas, and how sharp or blurry it appears. I like to use contrast to overall soften my photos depending on what look I am going for with the photo at the time, yet still sharpen and create definition for certain areas. For instance in the photo above, the gloss on the creme patisserie.
Teeth Whiten - You're probably thinking what on earth, you whiten your teeth? And from a first glance that is how it may sound, but this tool available on PicMonkey is not what I actually use it for. No matter how white something make look in person sometimes my camera will warm the image and therefore make the overall shade more of a yellow or cream. By using this tool it allows me to navigate around my photo and use a brush to eliminate the warmth from these areas and essentially 'whiten' them again. By using this it makes my photos look a lot cleaner and it usually makes the objects around the areas I've edited become a lot clearer also.
Temperature - Alternatively, you don't need to be as particular as me when an image is too warm/cool for your liking. The temperature tool is great for helping you gauge by what amount you want to change the tone of your image.
I think it can sound really simple and some will be thinking have you really wrote a post like this when its so obvious. But to some it's a learning curve, and I'm definitely included with this. I've been blogging almost 3 years now and my photos haven't always looked this way. It's actually quite funny when I look back and I think why on earth did you think that looked good enough to publish to the world? Even so, they haven't been deleted because it's really rewarding when I do look back and seeing the growth between then and now.


My mouth is salivating right now at the shot of that dessert. Yum! Totally agree with you on the temperature thing. Aside from 'highlighting' , temperature is my top tool when editing pictures. I really like to neutralize my tone. I haven't yet tried 'teeth whitening'- but it sounds like a great way to target certain areas. Thanks for the tip!
ReplyDeletexoxo - Kelly
www.dreaminlace.com
Loved this post and I use different tools to edit my images too but now stick to iphoto normally :) I love picmonkey and it provides allot for a free tool. X
ReplyDeleteJenny | Krystel Couture
The teeth whiten option sounds so useful as I always get the warm tone on my camera. Will have to give this program a go! X
ReplyDeleteeleanor's adventures // UK Fashion & Beauty Blog
Editing makes such a huge different with a little adjustment !
ReplyDeleteSara,
www.thecrimeofashion.com
This was lovely and I'm always curious to see how others edit their blog pictures.
ReplyDeleteJackie | fashionxfairytale |
I just want to know where i can get that drink from haha
ReplyDeletewww.imitationisthegreatestformofflattery.blogspot.co.uk
I use PicMonkey as well as it's just so easy and free! I pretty much do what you do now but it's taken me a long time to work out how to edit well xx
ReplyDeleteSam // Samantha Betteridge